
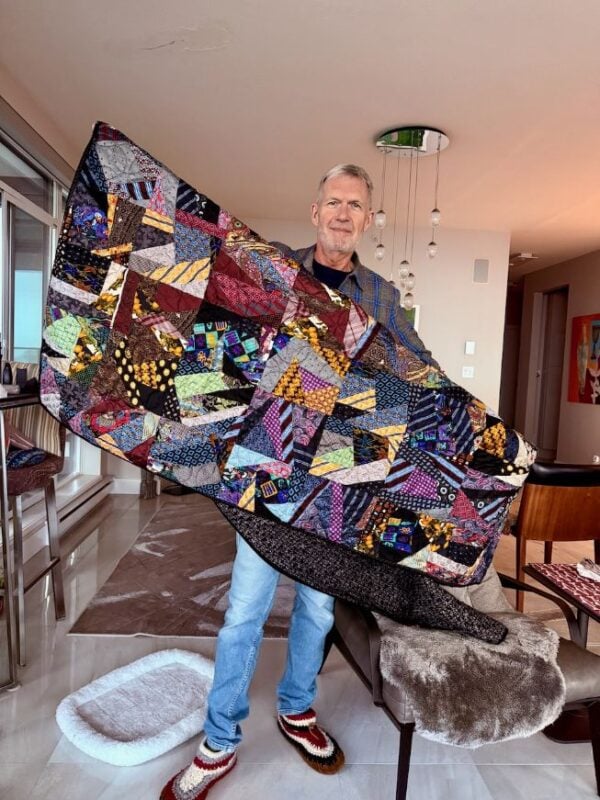
Kyle displaying his finished crazy quilt
I found an easy way to make a crazy quilt, after trying to make one the hard way. I know some folks can make them piece by piece, especially if they make it by hand. Thousands of quilt makers of old made lovely crazy quilts from scraps of fabric, possibly working on them as they collected more scraps late in the evening after the chores were done. But take it from me, it isn’t easy if you are making it with lovely ties from a customer who can’t wait for you to take hours and hours to make it.
When I discovered that my Electric Quilt library already had a large number of crazy quilt blocks, I found my ‘easy way’. As soon as I knew the dimensions my customer preferred, 100 x 60 sq.in., I figured out my plan. Using clocks that were 10×6 sq.in., I chose 20 different blocks and made 4 copies of each block to have 8 separate blocks. Next, I bought 80 paper-sized vanilla envelopes and put 3 copies of all 80 blocks in the envelopes.
Before starting the design process, I opened up all 50 of the ties and stabilized them with a backing of Pellon’s EK-130. Now I was ready to design my quilt.
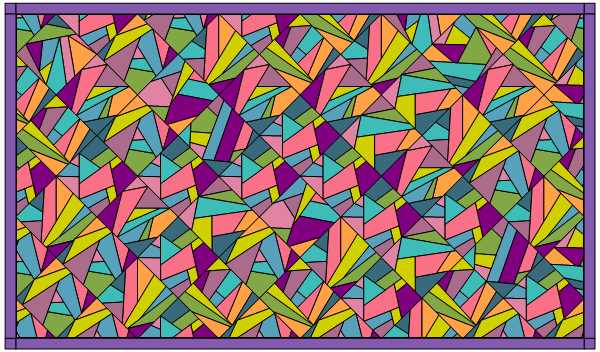
Mockup of one plan for a crazy plan. This isn’t the one I eventually used, as I decided against the diamond shapes.
I took one copy of the first block, cut out all the pieces which ranged from 6-8 pieces, approximately, and picked out fabrics to match those pieces. I put all the pieces back in the envelope and went on to the next one. I did this 80 times until I had all the pieces cut out and ready to go. I had two extra copies in each envelope, in case I messed up and needed another copy. I could have made do with just one.
I designed the quilt by placing the blocks on my design wall, a large living room wall covered in muslin. This makes it easy for me to see where I need to change the blocks for a more artistic arrangement.
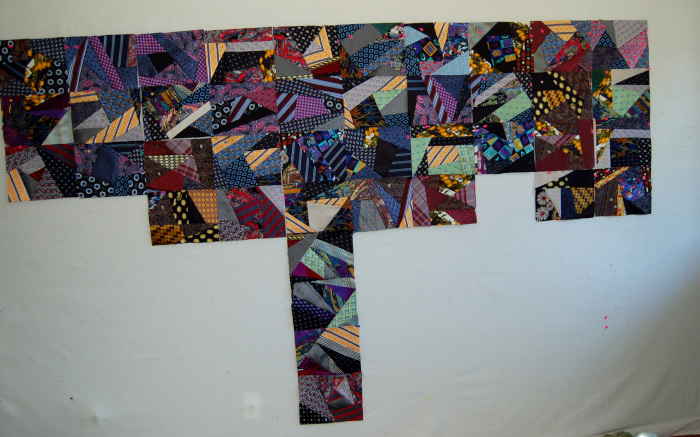
Placing blocks on the wall is the most enjoyable part of quilting. I have a large living room wall which is perfect for designing.
Sewing the pieces of these crazy quilt blocks was a snap, as the pieces all had a flat edge, making them easy to sew. The fact that the blocks were relatively small meant the blocks lay flat. I ironed them as I went along, block by block. The final step, of course, was sewing all the pieces together to form the final quilt. Then all I had to do was quilt it, bind it, and add a label on the back with Kyle’s words embroidered on it.
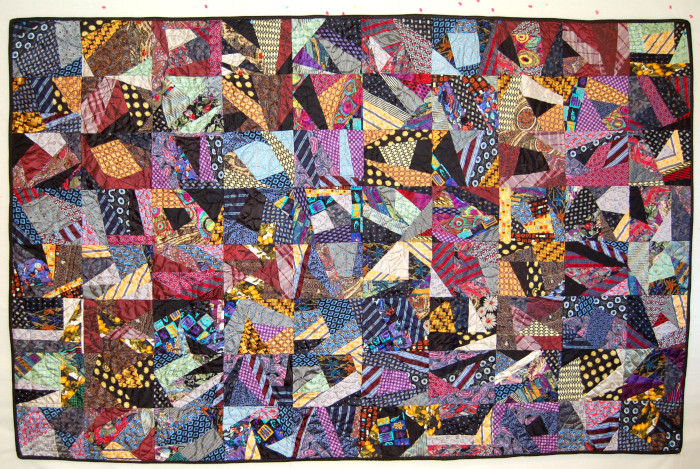
Final quilt made for Kyle out of 50 of his wonderful ties.
Kyle wrote to me, saying that “I love the quilt and I am so happy to have my ties in a form to enjoy for many years. It has been fun and a pleasure working with you.”