
My First Mural
This past December I had the pleasure of making my first Memory Mural at the request of Debby, Ben’s mother. She wanted a long narrow quilt to fill the space above the wainscoting in Ben’s room. She wanted a quilt which would memorialize Ben’s extraordinary life and the things he loved and would give her and her family a sense of peace and calm. Although she left the specifics to me, she did say that because of Ben’s love of the sea, she’d like an abstract seascape. Although she also wanted more traditional t-shirt quilt later, she chose to start with the mural.
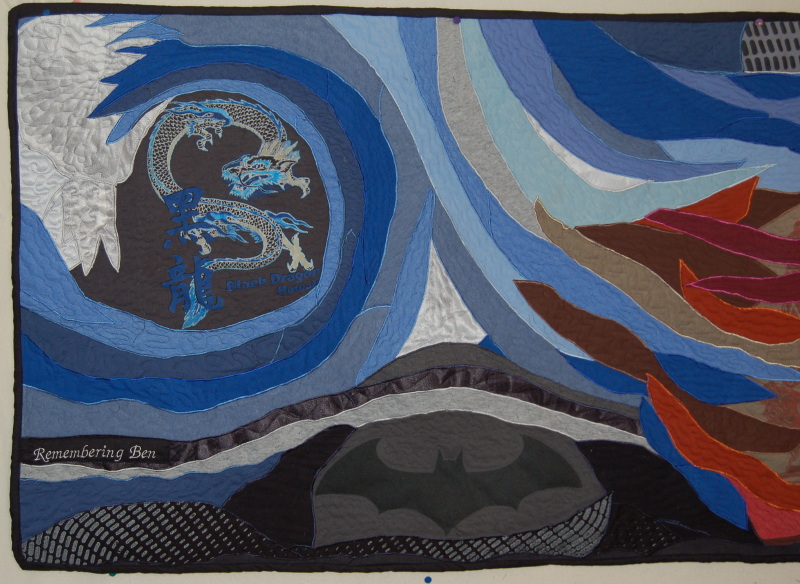
Memory Mural Detail showing dragon in the crest of a wave above and a batman logo below
Use of Logos in the Mural
As I sifted through the t-shirts to figure out which materials to use, I noticed one had a striking blue and white logo of a writhing dragon. It struck me as the perfect center for a breaking wave, so I asked Debbie if I could incorporate of few of the t-shirts into the mural. She agreed. A batman logo seemed to fit in the darker portions near the bottom, and the side panels of his swimming shorts gave texture throughout (seen surrounding the batman logo above).
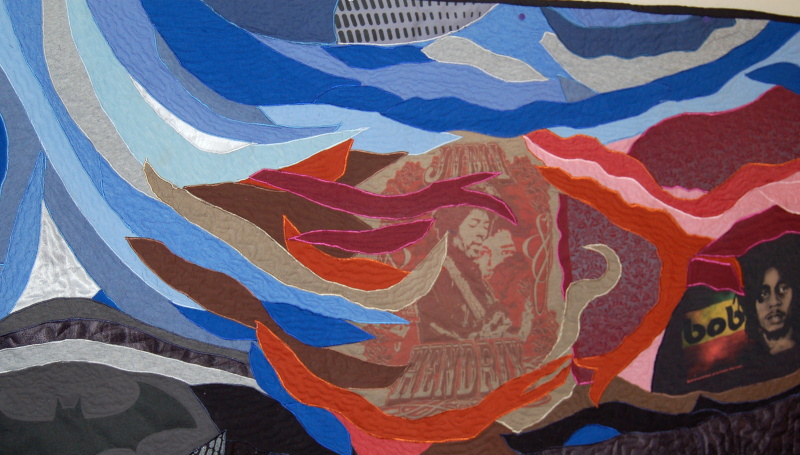
Jimi Hendrix logo inserted into Ben’s Memory Mural
Eventually five or six logos were chosen because they seemed to blend into the seascape. After the dragon and batman came Jimi Hendrix, Bob Marley, dogs wearing sunglasses, and a marvelous conglomeration of junk which I loved.
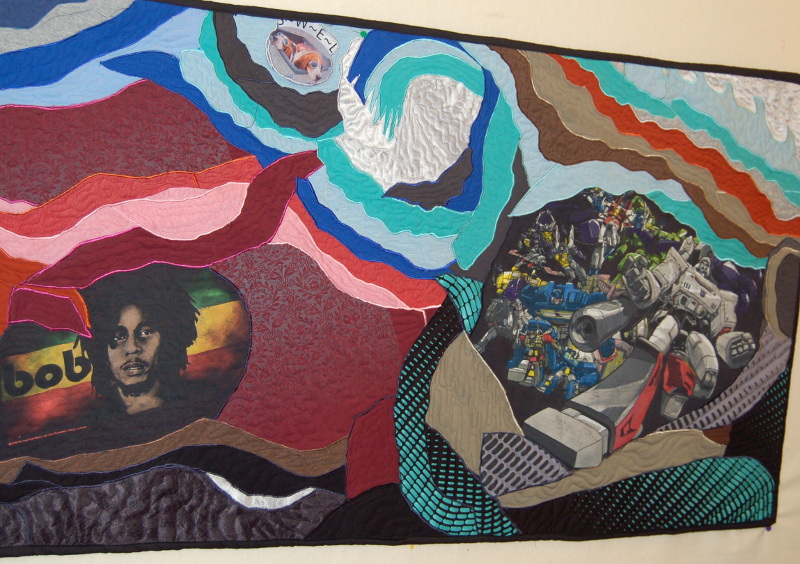
Detail of Ben’s Memory Mural showing three logos: Bob Marley, doggies at the with sunglasses, and a marvelous conglomerate which I loved
Constructing the Design
Then I went to work. The first thing I did was attach a long backing of turquoise fabric on my design wall about eight and a half yards long and 24 inches high. Next I cut out the backs of all t-shirts whose colors fit my design scheme. I stabilized them for sewing and attached adhesives so when I cut strips out, they’d be ready to be glued to the backing. Finally I cut out strips as I went along, glueing them to the mural backing bit by bit, inserting logos where I thought they’d look best. Below was the raw patchwork result:
Ben’s Memory Mural patchwork after initial attachments. Applique and quilting yet to be done.
Finalizing the Patchwork
After I attached the pieces, I satin-stitched (appliqued) every seam with appropriate colored thread. This is the most painstaking part of quilting and for me, one of the most enjoyable portions. Not only will satin stitching hold every piece of fabric in place but it delineates and adds a finishing look to the work, much like an outer binding does to the overall quilt.
Quilting and Labeling
I quilted the mural on my long-arm machine using a customized pattern of meandering. The quilting took about 12 hours due to all the glue which clogged the needle and caused the thread to keep breaking. Afterwards I trimmed it and bound it with a narrow black strip. I embroidered one label which was attached to the back and a second brief one saying “Remembering Ben” for the front. I als0 attached a long sleeve on the back for hanging and sent it to Debby.
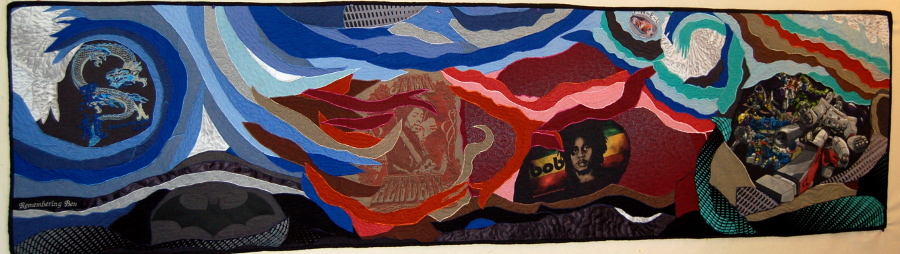
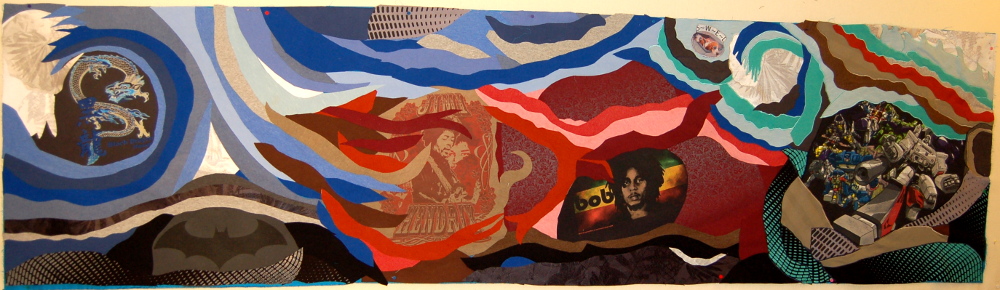
Memory Mural made from Ben’s T-shirts
Response
This was Debby’s response: “Oh Rosie, the quilt is amazing!!! The box arrived yesterday evening and we opened immediately. WOW! There is so much to look at! I love how you wove in all of those different fabrics to flow so beautifully together. . . .Thank you Rosie, we are so grateful to you and will treasure the beautiful quilt you made in remembrance of Ben for many years to come.”
For a quilter, there is no better reward than to get a response like this for one’s work! As a bonus, I thoroughly enjoyed this creative experience as it was so great to work with the wonderful colors and images in Ben’s shirts.