
Request for Bereavement Wall Hanging
A few years ago I made a large bereavement quilt for Teresa and Rick out of ties and scarves belonging to Rick’s parents. Below is a picture of that quilt:
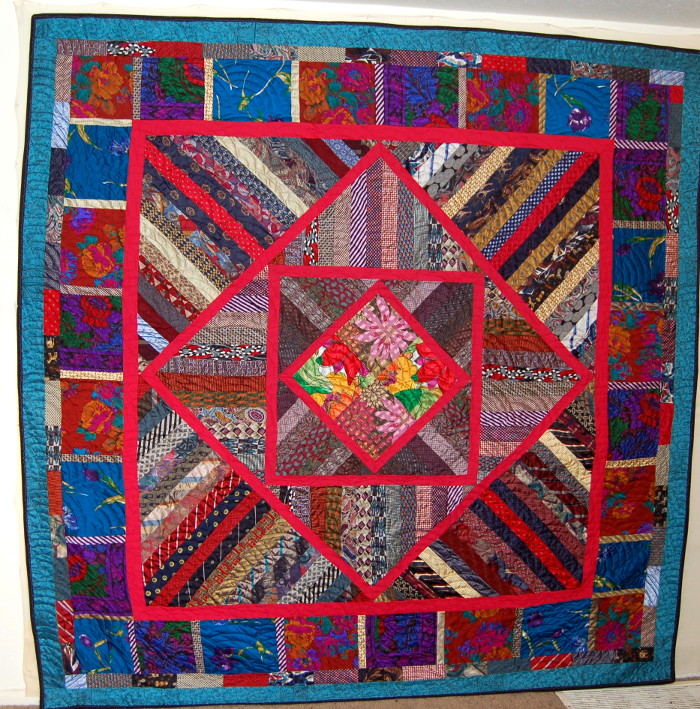
Bereavement Tie Quilt using Kaffe Fassett’s Organic Radiation design
I had lots of scraps left over from the tie collection, plus almost 55 scarves. Teresa asked me to make a bereavement wall hanging for their new log cabin home which they were building in North Carolina’s Appalachian region. I few years later their lovely three-story home was built and I sent them the wall hanging shown at the top. They received it right before they moved into their new home.
Story of the Design
Teresa left the design of the wall hanging entirely up to me. Her log cabin was situated in the mountains of Appalachia surrounded by trees, so trees were my focal point. I searched the internet for pictures of trees that I might like and almost immediately found one I loved.

Tree focal point of wall hanging design
- For several weeks I thought about how I’d like to make the quilt with this tree in the foreground. When I actually made it, I discarded almost every idea I’d had.
- I knew I had to first design a background, then add the tree at the last minute.
- Although I had planned to design a background using the misty hills in the background as a template, I realized right away that I wanted something much more interesting.
- Similarly, I had thought I’d make the flat plain on which the tree stands act as a mirror to the tree’s branches as is shown in the picture. That idea was also quickly discarded.
- So what was my design? I couldn’t imagine one. Instead I simply set about making the quilt with no design in mind, except that I needed a background for my tree.
- The design grew as I worked, changing as I went along. This was a first for me, working with a design that was wholly in my head. But it worked incredibly well.
Making the Quilt
Making this bereavement wall hanging was one of the best experiences in my life. I’d heard folks say things like “the book practically wrote itself” and that was true for me. This wall hanging seemed to be telling me what it should look like at every turning point. The main reason, I have to admit, was because the ties and the scarves were wonderfully versatile, not just beautiful but fashioned as if they had been made for this project.
Early stages of making bereavement wall hanging
-
Preparation
My first task was to cut out a large muslin backing over 6×4 sq.ft. and fasten it to my design wall. The idea was to attach pieces as I went along and to that end I stabilized fabrics as I needed them. If I planned to use part a particular scarf, I would stabilize it (usually twice as the scarves were thin and fragile) then add an adhesive. Now they were ready to be pinned onto the backing. Most of the tie scraps were already stabilized so that all that was needed was the glue.
-
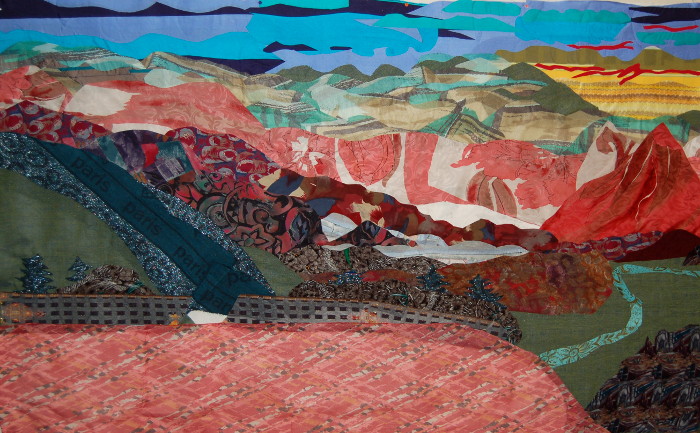
Initial Design
Starting the design I used the tree template above as a guide. First I attached a soft green fabric for the hills on the left side which formed a background to the tree. Gradually I added other items, discovering gems among the scarves and ties. Almost before I knew it and with little conscious planning, colorful hills and surrounding pink mountains ranged across the width of the wall hanging. I was especially thrilled with the bumpy range just below the pink mountains that was made entirely out of tie scraps. What an interesting grouping of colors, with even a little bit of mist curling among the hills.
-
Expert Advice
At this point, there was no tree, no plain, no sky, no lower field in the right hand side. But I was so excited I begged my art teacher friend to come and see it. She offered me several suggestions, all of which I took, but the best one was her off-hand remark, “You know, you could extend the mountains up and beyond.”
-
Adding Depth and Sky
I found one green, brown, tan and white scarf that subtlely depicted a mountain range beyond the original pink and white mountains. In the same fashion I was able to fashion a sky out of one very stylized scarf of blue, turquoise, navy, light green and white. For good measure I added a sunset (or sunrise?) out of two warm golden scarves.
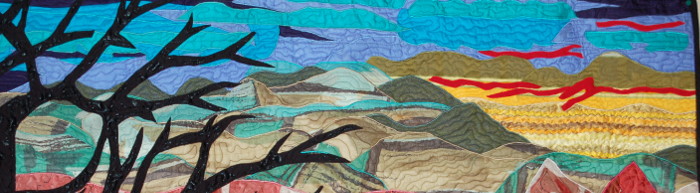
Sky detail of bereavement wall hanging
-
Raising the Tree
At this point, I stopped to give my design some thought. I used a paper template of the tree to check my perspective and quickly realized I had a perspective problem. If the tree was on a low plain, no way could one see the mountains beyond the first range. The tree platform needed to be raised. Already I had located a large scarf that gave the artistic impression of a flat plain on which to position my tree. And the rose color mimicked the pink mountains. Still more needed to be added to give the tree the illusion of being high up on a mountain plain.
-
Unfinished bereavement wall hanging with paper template in place of tree
-
The Fence
Again, the scarves came through. I found a long scarf that resembled an old wooden fence (at least in my imagination). By having the fence surround the plain and fashioning the tops of some evergreens behind it, I created the illusion of height. I even found a fence-like tie that created the impression of a fence disappearing down the slope. Down below I made a grassy field and curved a distant river through it (another of Jan’s suggestions.)
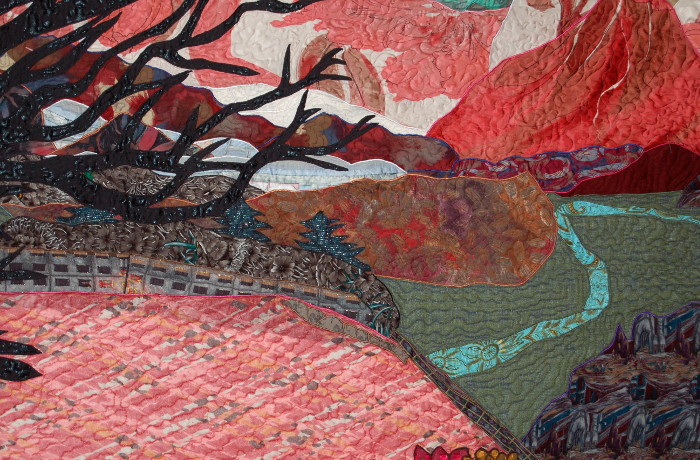
Detail of bereavement wall hanging showing fences
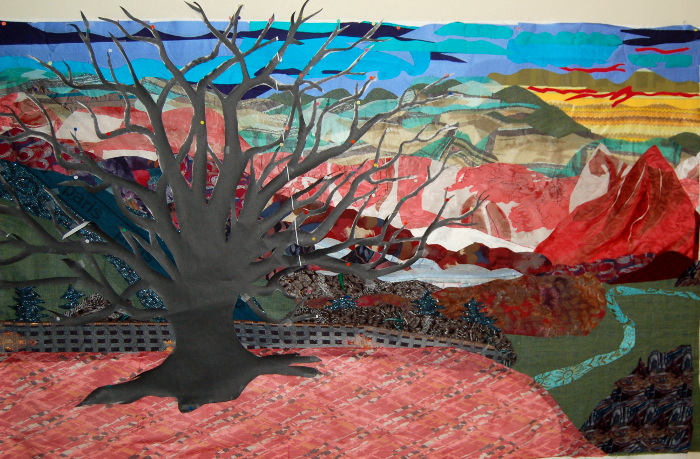
Story of the Tree
After adding a few more items I was ready to apply the tree. I had made two large copies of the original tree picture and carefully cut one out, omitting most of the tiny background of branches. Fortunately I was able to find a polyester blend that looked exactly like the black bark of a tree at a local fabic and notions store (Joann’s). After applying adhesive to a large piece of this fabric, I spent a great deal of time cutting it out, then carefully applied it to the patchwork and ironed it firmly on.
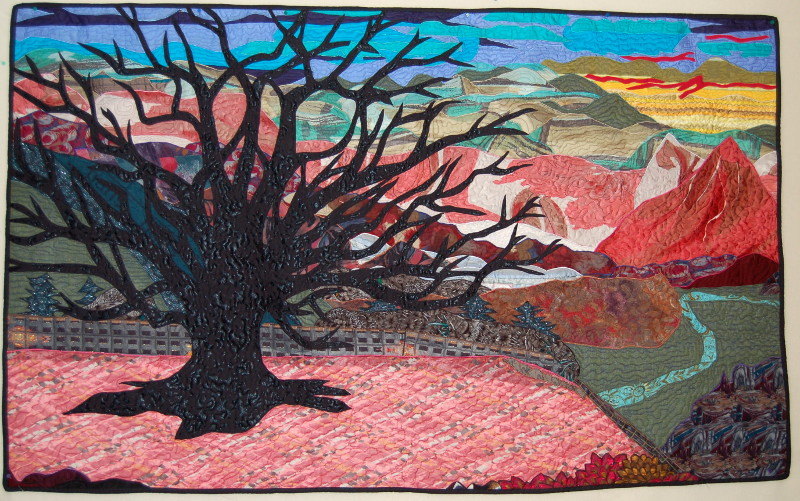
Bereavement wall hanging made with scarves and ties
Final Thoughts
After adding all the finishing touches, quilting it with a customized meandering stitch, binding and labeling it, I sent it off to Rick and Teresa. They loved it. I don’t think I can think of a better way to display both these precious lovely scarves and ties that once belonged to such special loved ones.